

1 Hour
2
0
$34.00
Note: KSL, its service providers, and the seller receive data from this message. See our Privacy Notice and TOU for details.
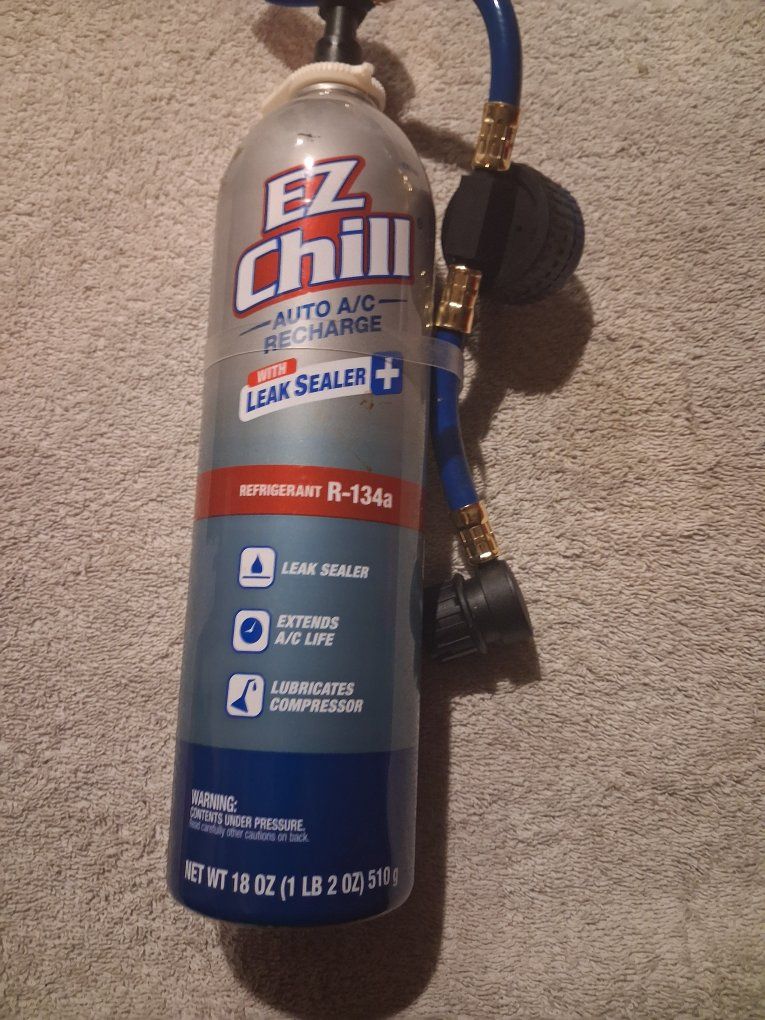
The image displays an EZ Chill R-134a Auto A/C Recharge Kit with Leak Sealer. This product is an all-in-one do-it-yourself aerosol container used to add R-134a refrigerant into an automotive air conditioning system, replenish compressor lubricants, and temporarily seal minor leaks in rubber hoses, gaskets, and O-rings.🛠️ Step-by-Step InstructionsLocate the Low-Pressure Port: With the engine off, look for the metal A/C tubes under the hood. Find the low-pressure service port, which is on the thicker aluminum line. (The quick-connect coupler on the blue hose is physically sized to only fit the low-pressure port, protecting you from accidentally attaching it to the dangerous high-pressure side). Unscrew the plastic cap from this port.Set Up the Vehicle: Turn on the engine, turn the A/C settings to Max Cool / Coldest setting, set the fan speed to High, and turn on Recirculation mode. Let it run for a couple of minutes to stabilize.Prepare the Kit: Unwind the attached blue hose. Remove the plastic safety shipping disc or cover located under the button/gauge assembly if present. Ensure the assembly is screwed tightly onto the can.Connect to the Port: Pull back the locking sleeve on the blue quick-connect coupler, press it firmly down onto the car's low-pressure port until it clicks, and release the sleeve to lock it in place. Give it a gentle tug to verify it is secure.Check the Initial Pressure: Before pressing the dispensing button, look at the integrated gauge to check the pressure reading while the A/C compressor clutch is actively spinning. If the needle points into the target green/blue area, your system does not need refrigerant.Dispense Refrigerant: Shake the can thoroughly. Hold the can upright, push down the button/trigger firmly, and add refrigerant in 5 to 10-second bursts. While dispensing, slowly rotate the can back and forth between a 12 o'clock (upright) and 3 o'clock (sideways) position to smoothly alternate the liquid and gas mixture. Never turn the can completely upside down.Monitor the Gauge: Release the button and wait about 30 seconds for the system pressure to equalize. Check the gauge needle again only while the compressor is engaged. Repeat the dispensing bursts until the needle rests solidly in the safe target zone. Do not overfill into the red zone, as overcharging will cause the A/C to blow warm air or damage components.Disconnect: Pull back the coupler sleeve to remove the hose from the service port, then screw the vehicle's plastic port cap back on tightly.

KSL Classifieds makes it easy to buy and sell with peace of mind. Check our safety tips and quickly report anything that doesn’t look right to keep your experience smooth and secure.


1 Hour
2
0
$34.00
Note: KSL, its service providers, and the seller receive data from this message. See our Privacy Notice and TOU for details.
KSL Classifieds makes it easy to buy and sell with peace of mind. Check our safety tips and quickly report anything that doesn’t look right to keep your experience smooth and secure.


The image displays an EZ Chill R-134a Auto A/C Recharge Kit with Leak Sealer. This product is an all-in-one do-it-yourself aerosol container used to add R-134a refrigerant into an automotive air conditioning system, replenish compressor lubricants, and temporarily seal minor leaks in rubber hoses, gaskets, and O-rings.🛠️ Step-by-Step InstructionsLocate the Low-Pressure Port: With the engine off, look for the metal A/C tubes under the hood. Find the low-pressure service port, which is on the thicker aluminum line. (The quick-connect coupler on the blue hose is physically sized to only fit the low-pressure port, protecting you from accidentally attaching it to the dangerous high-pressure side). Unscrew the plastic cap from this port.Set Up the Vehicle: Turn on the engine, turn the A/C settings to Max Cool / Coldest setting, set the fan speed to High, and turn on Recirculation mode. Let it run for a couple of minutes to stabilize.Prepare the Kit: Unwind the attached blue hose. Remove the plastic safety shipping disc or cover located under the button/gauge assembly if present. Ensure the assembly is screwed tightly onto the can.Connect to the Port: Pull back the locking sleeve on the blue quick-connect coupler, press it firmly down onto the car's low-pressure port until it clicks, and release the sleeve to lock it in place. Give it a gentle tug to verify it is secure.Check the Initial Pressure: Before pressing the dispensing button, look at the integrated gauge to check the pressure reading while the A/C compressor clutch is actively spinning. If the needle points into the target green/blue area, your system does not need refrigerant.Dispense Refrigerant: Shake the can thoroughly. Hold the can upright, push down the button/trigger firmly, and add refrigerant in 5 to 10-second bursts. While dispensing, slowly rotate the can back and forth between a 12 o'clock (upright) and 3 o'clock (sideways) position to smoothly alternate the liquid and gas mixture. Never turn the can completely upside down.Monitor the Gauge: Release the button and wait about 30 seconds for the system pressure to equalize. Check the gauge needle again only while the compressor is engaged. Repeat the dispensing bursts until the needle rests solidly in the safe target zone. Do not overfill into the red zone, as overcharging will cause the A/C to blow warm air or damage components.Disconnect: Pull back the coupler sleeve to remove the hose from the service port, then screw the vehicle's plastic port cap back on tightly.